Marker Man Misadventures 9
It's time for world 8! I mean.. wait. Yeah, it's world 8. This isn't a mario game, is it? That could mean that this is the last world. Nah, we're definitely hitting level 100. Strap in, my dudes.
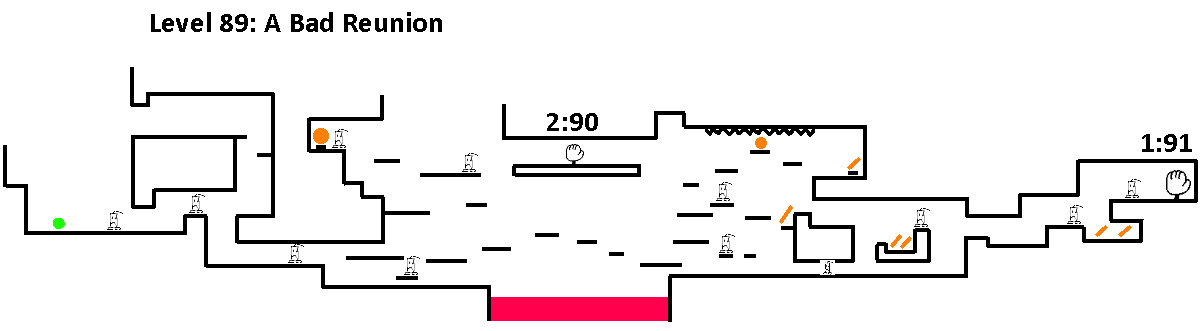
12 seconds. 7 and a half measures. You can maybe get away with 8 and a half measures if you know what you're doing. I guess just interpret the song as a 2/4 time signature and you will have 15 full measures and it makes more sense. I don't even know anymore.
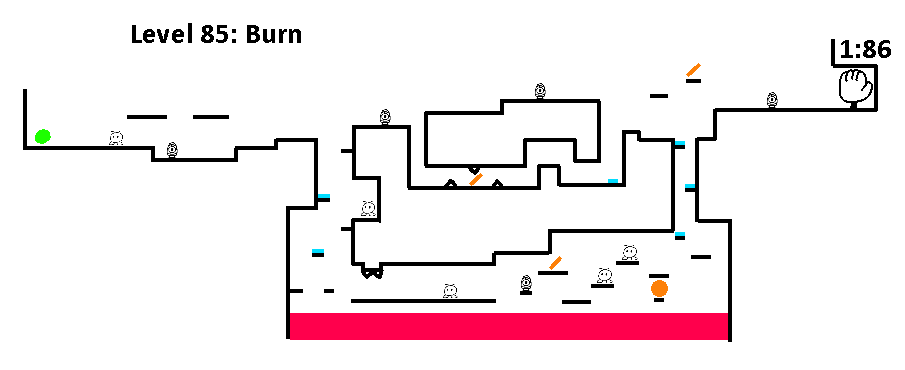
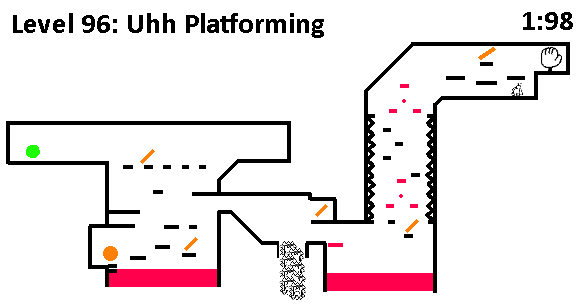
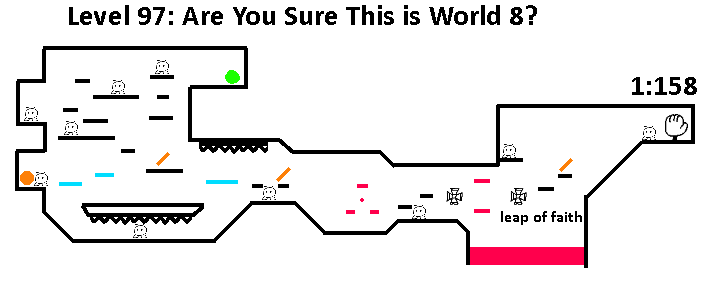
There are three main pathways. The lower path can be avoided by taking the middle or high path and then going down from the other side to get the coin. Going down the lower route is scary because the last bouncy platform on the way down doesn't actually show you what you can land on due to the poor camera view. Good old lava returned to its resident world, and will now be an additional hazard to avoid. On the bright side, you can build over the lava.
Fire Turret

Pretty much the same as the spear thrower, as far as I can tell. A fireball is shot out instead, and accelerates as it flies through the air, imparting its momentum on drawn objects. 8 damage.
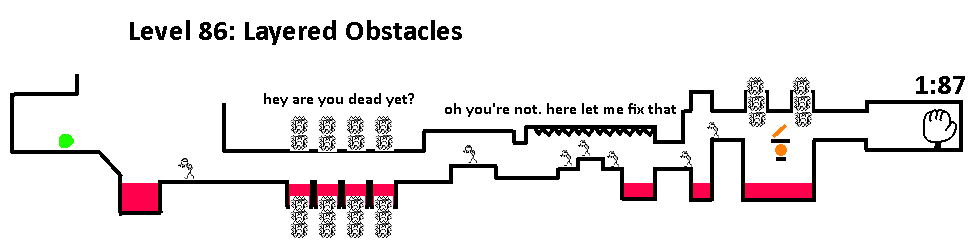
Markers are sparse in the last level and even less so in this one. This game is demanding you to be at your most resourceful if you want to survive. Resort to pushing tactics where you build a shape and push against it to knock an enemy out of the way or into the lava. In the spike part, push that first zombie to the right with a shape and push the second one off that ledge to where the third zombie is. Then, build and jump over them, ensuring you put a rectangle down in the lava pool. Thinking about how to get the most use out of your markers is what's going to allow you to live here; attempting to jump over the zombies will result in death.
Getting the coin is fun. You can build to the marker despite the walls getting in the way, because they cannot push through your line if it's stuck to the ground. Once you're above the coin, there is enough space to drop down onto the platform underneath to grab it. There is just enough leeway to draw directly from that platform to the platform away from the lava area. This level loves chaining dangerous elements together, hardly giving a break for the player.
Angry Wall

Take a guess.
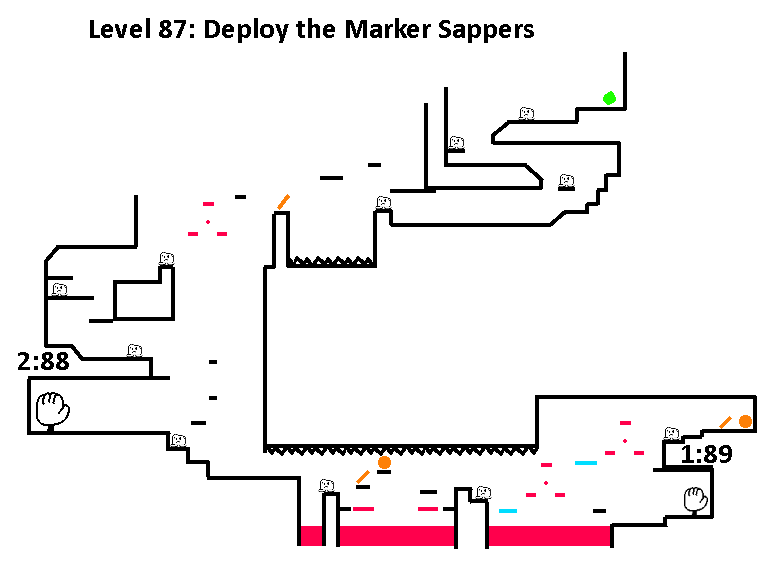
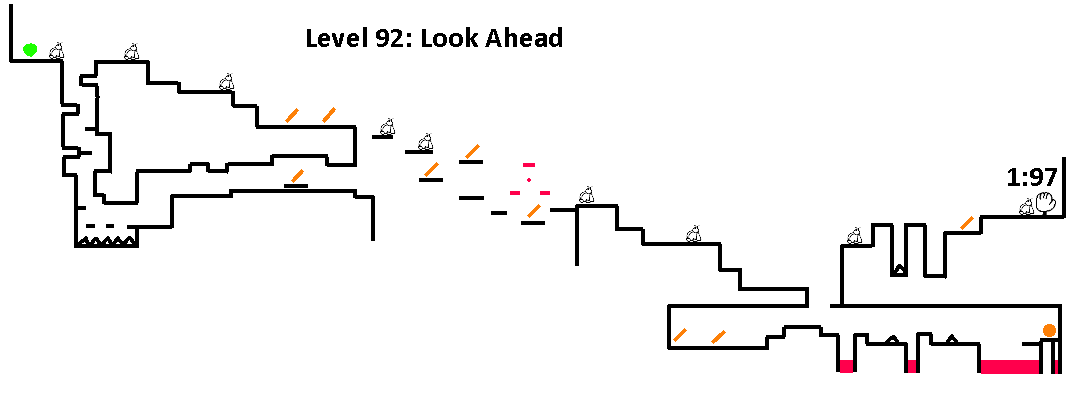
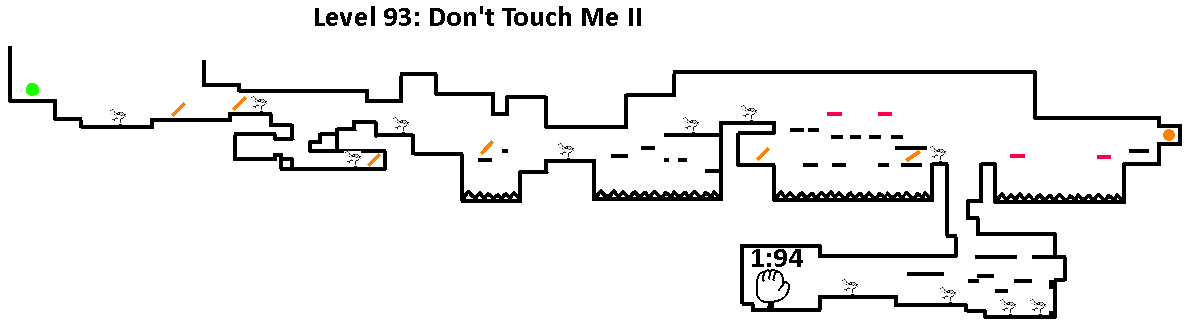
Do not touch the toxic sneezes. Do not compromise touching the toxic sneezes. If you game over'd and started on this world you won't have the ability or want to even be able to use your powers. Markers are still scare, so build over them or push them out of them way. There's one part in particular that's really nasty and I had to fail the jump just so I could give you the best advice here. Don't even bother getting on the rotating platforms. Before the first rotating platform, drop down instead to the ledge under the marker. If you were to drop down right there you would land on a nice, flat surface. This is a perfect opportunity to draw a line shape and use it to prevent fall damage. As a bonus, you skip a lot of the level in the process.

Notice how far you have to go without getting any markers, assuming you don't take the bottom path. You will almost definitely have used up a marker by the time you get to the area with the coin. Obviously you want to avoid the golem fire to take as little damage as possible, so draw that barrier to the left of them to disable them temporarily. Getting to the area with the coin is the easy part, unfortunately. You will be greeted with a top path and a lower path, and both will almost definitely kill you if you attempt to pass through them, with death either by spikes or by rocks. The best strategy is to go build on the spike layer and avoid the barrage of rocks by the golem. When you're going back up, build a line long enough to get out of the spike pit and block the golem's shots at the same time. Trying to take the top path where the golem is guarding is possible, but... just go the other way around.
How to get past the angry walls? It may sound weird, but the best way is to build on top of the angry walls. Placing a line between the ceiling and the walls will force them not to go above the ceiling, and once they go low enough, you can jump on top of that platform. The spikes cannot go through the platform you built, and so you'll get squished under the ceiling for a bit before the walls give up and move back down. No damage taken! However, once you reach the coin the golem from the left will start firing rocks at you. As if taking 8 damage per hit isn't bad enough, the rocks actually push you back slightly! It only takes a couple rocks before you get pushed into the angry walls and die instantly.
This is the most difficult challenge in the game so far. Hours were spent on figuring out how to take the least amount of damage through this segment. Here's the strategy. First, draw a line above the angry walls to get over them. Then, draw a right triangle on the far left side from your position, using the camera panning. Make sure the slope faces to the left. What happens is the boulder hits the triangle, but its momentum is split into vertical and horizontal components, because the boulder hits the shape at an angle instead of a completely vertical edge. A significant amount of the momentum is transferred to the ground and helps keep the triangle at its current position with the help of friction. You need to act fast because the triangle will disappear in about 10 seconds. You should have enough time to go in, grab the coin, make another platform if you need to, and go back. Success!
The reason why the platform above the wall is drawn first is because the game resets the despawn timer for a shape if marker man touches the shape. So, it makes more sense to draw the platform first so that the triangle shape has more time being useful.
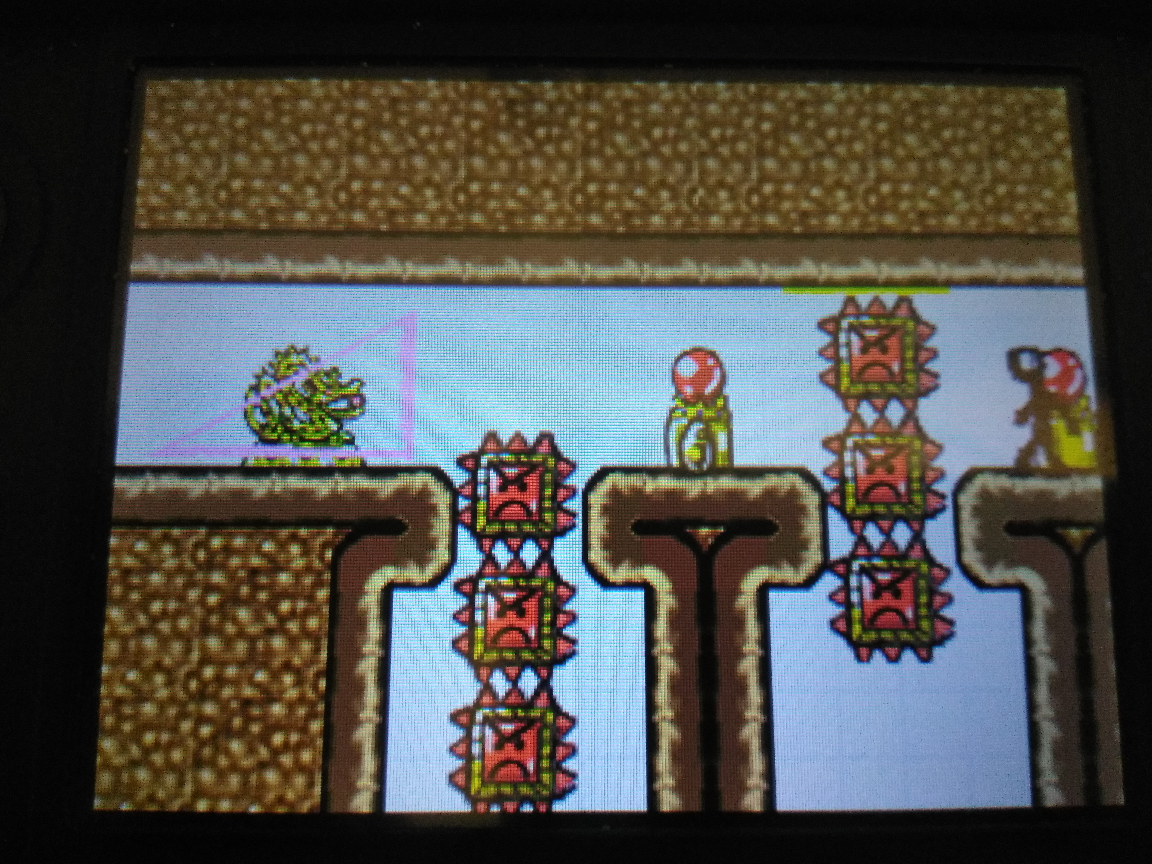
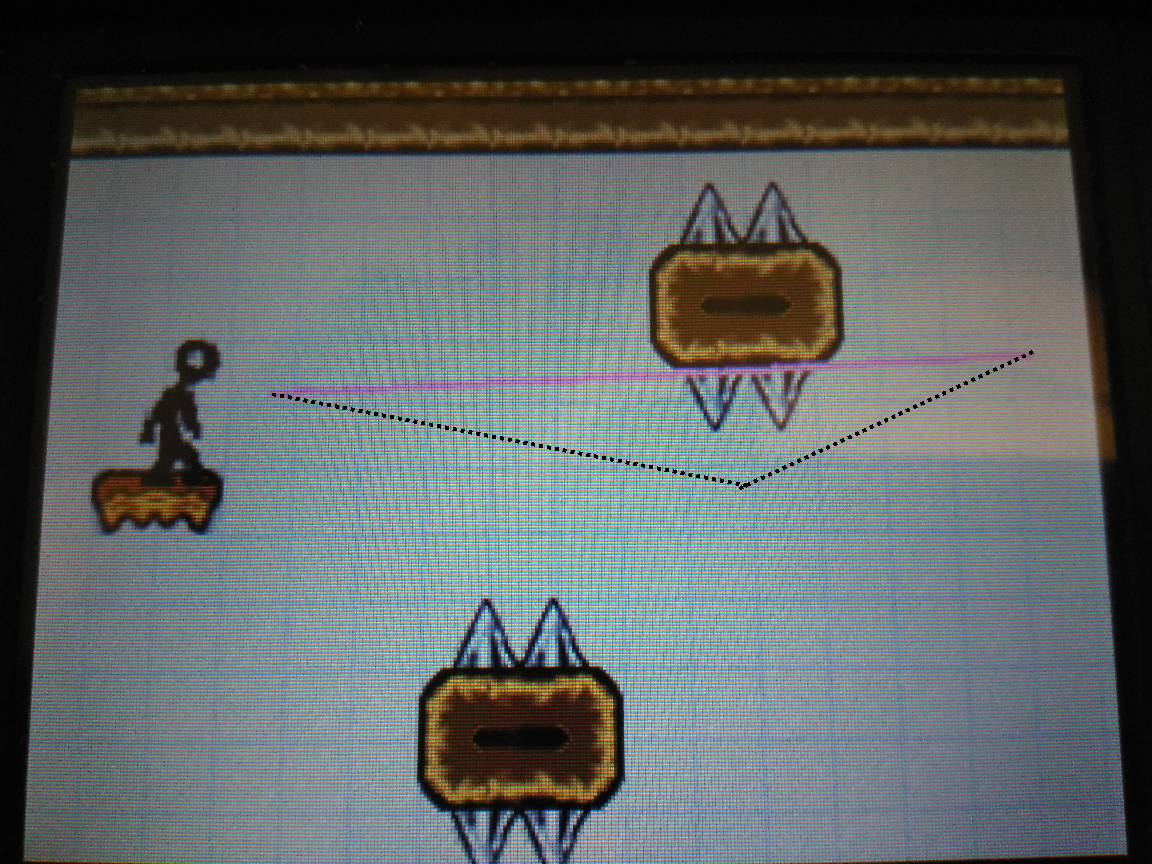
Sorry for the short novel about this level, but there is one last thing I learned here. When you create a shape, no part of it can touch a solid entity or else no shape will end up being drawn. The game also has some sort of algorithm to determine whether the curve of your drawn line is valid enough to become a certain shape. Since the collision detection only checks for the drawn line you have created instead of the shape that would be created as a result of the draw, you can trick the game into spawning a shape with a solid entity inside of it! I will have to experiment to see how useful this is, but below is a photo of me drawing a line through spikes: the black dotted line is approximately what I drew, and as you can see it does not pass through any solid entities, yet it is close enough to be considered a line. Neat!
Golem

Almost the same enemy as the spear thrower and fire turret. It appears to have less sight range, meaning you won't get shot from far away by the golem, but its attack speed is a lot faster and more consistent. This makes them dangerous up close. Place a ramp on the left side of the golem (the rock it throws spawns on the top left corner of its sprite) to disable it, since a spawned rock has no momentum to push the ramp.
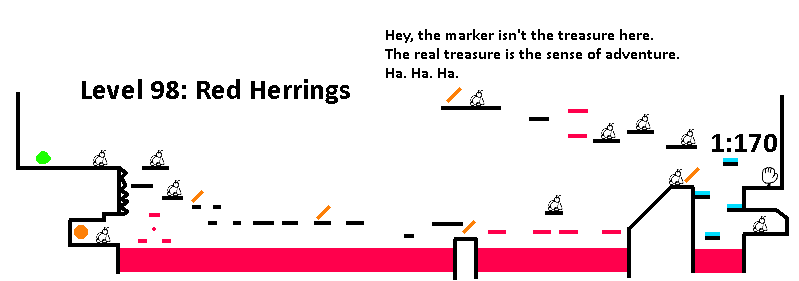
What??? Sad dynamite is back from world 1?! Wow, it's been a while. Let me hug you! Oh… my HP went from 86 to 14, a total of 72 damage. Okay, so sad dynamite's damage also scales over worlds. A lot of the enemies are placed in inconvenient locations, meaning you'll have to make some judgments as to whether you really should be jumping over that dynamite stick. Fortunately there are plenty of markers in the level to fix your mistakes.

It's pretty hard to die in this level, which is good. It's also pretty hard not to lose your markers, which is bad. I guess if you had no markers to begin with then this level is just a free pass through. Good for you? This level aside, I'm actually impressed on how well thought out these levels are. They are by far the best levels I've played. There is actual need for resource management and clever thinking on how to pass certain obstacles. It's as if a different level designer that knew what they were doing came in and worked on this world.
This level is fairly mild, despite the fire turrets everywhere. You already know how to pacify them.
This one starts off pretty weird. The golem refuses to throw the rocks despite you being very close to it. Only when you move to the right of it does it start firing. What an honorable golem! Using your camera controls will be helpful here so that you can be prepared for a golem ambush.
They're just making really sure that you don't have any markers left by the end of this world.
In unrelated news, I finally found a good use for that drawing glitch where you can draw shapes through solid entities. Let's say you have an enemy and it is in an annoying spot, and it's near an edge. If you had the ability to draw under it, you could draw a long line so that most of the line hangs off of the ledge and the enemy sits on top of that line. The line flips off the edge due to the lack of balance and throws the enemy along with it. You can use the draw glitch by drawing next to the enemy, then angle the line upward, then angle back downward some distance away, and congrats, you draw a line under an enemy!
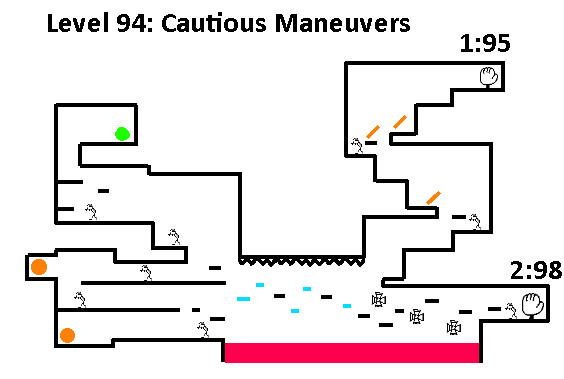
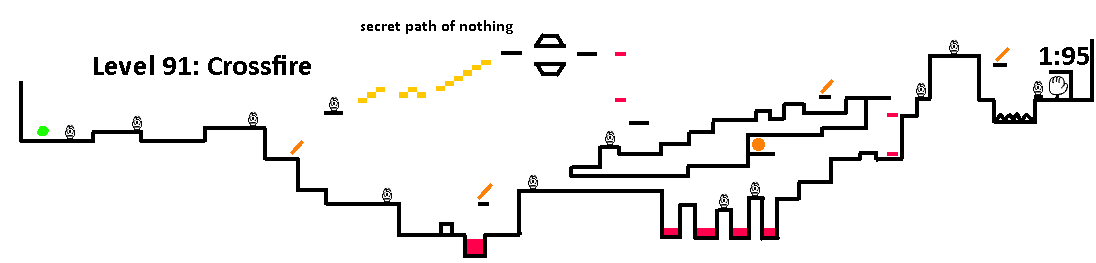
In order to get to the top path in the lava area you cannot simply build a line from the platform underneath the fan to the top platform because the fan will knock the line (and you) away. The problem with going to the previous non-bouncy platform is that it's too far away to build straight to the higher platform because you have to stand on the very edge to see it. However, you can build a line from the higher platform to above your head, then move out of the way and the shape will drop to the edge of the platform you were standing on. Build the line high enough so you have enough time to move left when you build it, otherwise you'll just get stuck under the weight of the line.
It may not seem like it, but you can build from the beginning of the spike pit to the far non-moving platform to the right. Build over the moving platform, and the line will actually be so heavy the platform cannot push it up and will stay down. This is going to be some scary advice, and you're going to have to trust me on this, but jump on the fans when you get there. If you land right on top of them it will either push you upwards or towards the direction they're spinning. If you keep this mind, it's possible to stay bouncing on the fans. It will take some practice, but it is worth the trouble.
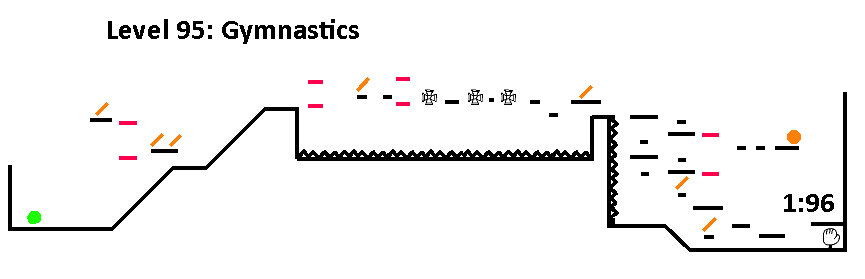
The only painful part of the level is the double spiked wall area. Drawing a line over the whole thing can work, but keep in mind that the two wall columns that are there are out of sync, meaning that the line you draw will be tilted around. What happened to the challenge of this world? Did the person who made the first few quit after realizing what they were in for? I guess I wouldn't blame them.
There is nothing to say about this level that I haven't already said in previous levels.
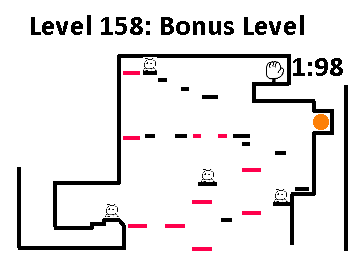
Look, it's a bonus level haha
A golem blocks your path! What's hilarious is because of my insane determination to find a solution to level 87, this gives us another solution to getting around the golems in general. Place a right triangle with the slope facing the golem, then push it. The boulders will have a very tough time moving the shape and you'll be protected by hiding behind it. You could draw a line over the first golem, but then the second golem farther out will knock that line out of the way and you'll start getting pelted. Use the triangle to get very near the first golem, then pacify the second golem using the line trick, then pacify the first golem using the line trick.
To get to the coin, you have to use the rotating platforms. I recommend starting further right and building to the rotating platforms to avoid the golem above, both going there and going back. You know, that's my advice for the whole level: when in doubt, build over the lava.
Wait what? This doesn't lead to 99? I was so sure we were going to hit level 100 by the end of this world but I guess not.
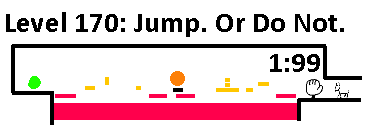
If it isn't obvious from looking at the map, the goal is to jump over the fading block obstacles so you don't get knocked off the moving platforms. Although building to the end using the fading blocks isn't a bad idea, it actually isn't that tough to do what the level designers want you to do. Jump over the first one, duck under the second, jump over the third. Or you could do it the cool way and just… stand there. Turns out if you run into the fading block the moving platform just stops, probably from under the friction of your character, until the fading block disappears. No need to jump over anything! World 8 is done!
This was by far the best world. The first half at least. Everything else was the standard marker man type of level I've come to expect. Due to the necessity of survival I learned a bunch of new tricks along the way. Here's hoping I can use them in this next world.
